Showing posts with label balcony. Show all posts

Monday, March 31, 2014

Balcony Garden Update 03/31/2014

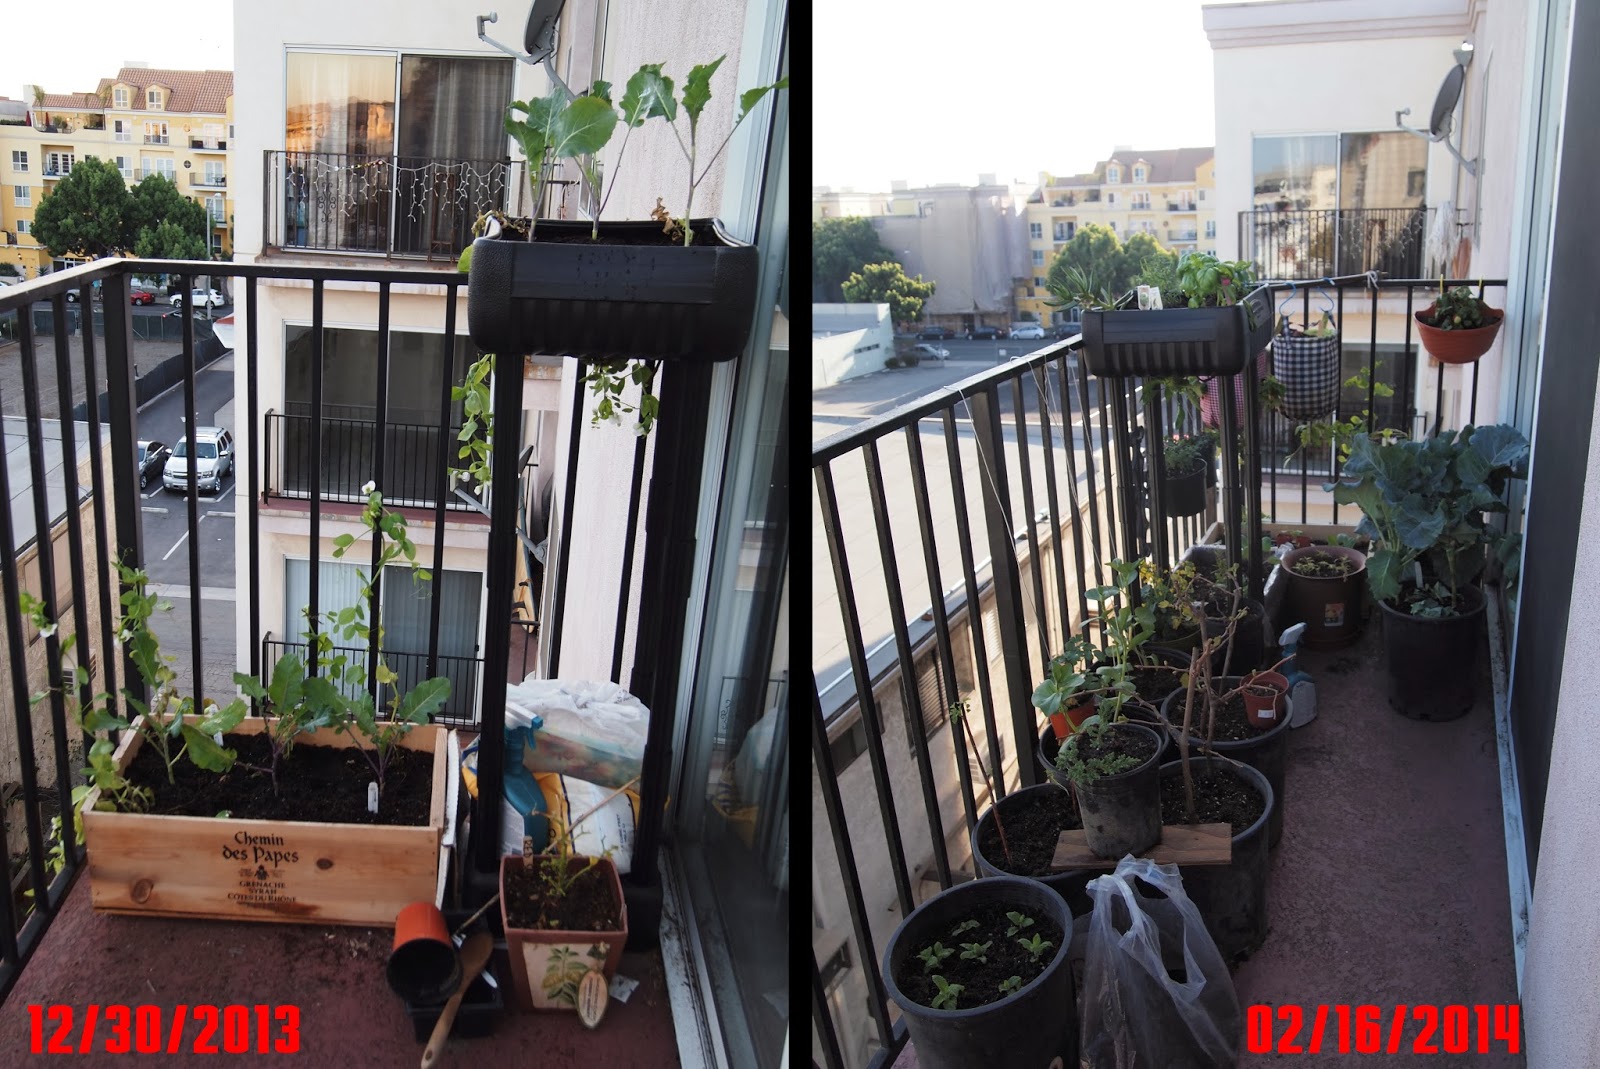
Spring time! Today is exact three months after the beginning of my balcony garden on 12/30/2014.
The garden is improving everyday with a lot of thoughts, planning and moving :-). I found myself hasn't been very good with growing plant from seed yet. So far I just had luck with pepper, bean and lettuce seeds. Lucky that the Japanese nursery near by provided very good variety of plants. I like to start with nursery plants because it save me time and plants are being sold seasonal.


After some pruning, the blueberry is getting back to shape. Pruning will help produce bigger fruit as I learn so let's hope for some juicy, tasty and super organic blueberry in the upcoming months :-).


Here is the Blackberry. I got it from the nursery and it didn't look so good but I got some discount for that so I din't complain :D. After moving it to a new bigger house with plenty of organic soil and water,  it now blooming. It suppose to have fruits in June.


This birdfeeder is a joy. All of the birds around came party on it everyday.


The grape I got on Valentine is now growing strong. I hope I will have them climb on the trellis soon.


The Japanese egg plant didn't do so good on the Self watering container so I moved it out. It's having flowers now but I don't know when will I have some eggplant.


Brussel sprouts are doing fine, I think. It's hard to keep them from pests so I think this will be the last time I grow them. Their leaves are a good house for all kind of pests.


I grew some corns from heirloom seeds. They are gonna take up some spaces but corns were so easy to grow so I gave it a try.


After sacrificing the first fruits as expert said, the strawberries are now developing stronger root and leaves. they are having some flower now. I don't want to wait any longer for those tasty Alpine strawberry. 


Fava Beans are doing well also with a lot of flowers but there are no beans yet.


Zuchini is the best guy in the garden. First blooming with large fast growing zuchini. I have to hand-pollinating them every morning but it was an enjoyable process ;-)


My raspberry also has a lot of flowers. It has been really rejuvenate since I moved it to a bigger container with plenty of good soil. After some grooming it become handsome again!


The lettuces and the lime tree are also enjoy their container. I don't know why when I brought the lime tree home, all of its flowers were falling. Now it's blooming agains with a lot of new young leaves.


And here is the small container of herbs and lettuces :-). This patch is special grow for Spring Roll - our Vietnamese supper healthy dish.


I've been having a lot of good time with my garden. My balcony is now a relaxing place with a lot of green and shade. I wake up everyday excited to have the morning coffee in my garden, watching birds and taking care of my plants.  :D


Sunday, February 23, 2014

Self watering planter - Homemade "Earthbox"

The small trial version of the selfwatering is working fine. I didn't have to water my plant for almost 4 days and the soil is still moist.
Just on time I saw the plastic storage tote at the hardware store is on sale. It's a pure plastic and I heard that it's better food grade than the recycle one so I decided to give it a try since $4.99 is not going to be a big lost.
The question about if it's safe to grow food or not is always haunted me. I stayed up nights to do to researching but I couldn't find the right answers. Seem like most of people just pick the name they trust and go with it. There is no scientific testing or proves so I decided to go with the one I got until I can buy the real Earthbox.
The whole material costs were $4.99 + $2.40 + $0.90= $9.19
I reused the nursery pot from the plant I bought before and drill a  lot of holes around it.

I based on the bottom of the tote and cute the lid bigger than the bottom in hope it fit into 1/3 of the tote's height.

I did the same with the pot.

This is the part that required the most labors. It took me almost an hour to drill all the holes. My boyfriend helped me and he did it faster. My arms were so sore after this ;-)

I watched a lot of video about DIY selfwatering container and I decided to go with this design - drill a hole on the side by the level where the soil touched the water. And I insert a L shape pipe which can be found at the hardware store. This will be the place where I refill water.

Th pipe were cut to the height of where the lid fit into the tote.

And then I put everything together like this. At this part, you may wonder why I started with a green tote and now it turned to a blue one. Well, my boyfriend came to help and his manly hand brake the green tote ;-). Lucky that I bought two totes because they were on sale. They are the same side so I just used everything I made so far on this blue tote.

I also drill some hole at the same level with the water pipe so when I fill water, I know it filled if I see water come out from these holes. They also served as air circulation and preventing overwater - as I learned from internet.

I packed soil mixed into the pot first. I used Miracle Grow because I have plenty of them left and I mixed it with organic compose as the Earthbox website advice. 45% + 45% + 10% organic fertilizer. I usually don't use much fertilizer on my plant because I am trying to be as organic as possible and I don't really care if I will get big fruits or vegetables. But since it was an experience, I tried to follow there method.


After packed all the soil, I made a fertilizer strip as Eartbox method.


The clear tube were insert into the L shape tube for easy water filling.


After filled all the soil, I gave it a good water.


I took my Zebra tomato plant that I started two weeks ago with an upside down planter and put it into the selfwatering planter. I concerned about the bag I use for upside down method is not food safe because of its coating. The Zebra tomato will straight itself back after several in this position - I hoped. I also took the bell chili and Japanese eggplant out of the upside down planter since they didn't look so good  in where they were before. I tested different plants on this container to see which plant will grow the best. I had the zuchini and brusel sprout also on other planters to compare.


I reused the left of the lid to made the cover. You don't have to do this but it help prevent the lost of water.

I decided to drill more holes near the water tube so it would be easier to monitor the water from this side. It took a while to fill the water reservoir with my small watering can.


That's it! It took me about an hour at the hardware store to look for all the part because I loved spending time there looking at stuffs ;-). And then other less than two hour for the rest. I don't mind do it again but the plastic quality is my biggest concern. I think I will save money to buy the real Eartbox if I see this method work out for my small space. Eartbox material are UV protection and food grade so I don't have to worry about my foods got poisoned from leads.

Updated for today! I was worrying about the container will get heat up and release whatever poison which may contained so I wrapped the aluminum heat insulator around it in the hope to keep it cool down. And here is the final look ;-)

Sunday, February 16, 2014

My little garden in Santa Monica

I always wanted a garden and I always tried to grow plants whereever I live. This time I moved to an apartment in Santa Monica, CA. The weather is very nice. I live on the top floor so I have sun on my balcony all day. I never grow anything in place like this before so I didn't know where to start until I saw the Compact Up Side Down Planter on Amazon for a good deal. It first started with just the planter and my wine crate. After 10 weeks and some trial and error, the hanging garden expended and growing well :-). Gardening is truly a relaxing hobbies and keep me out of trouble :D.